Quickstart
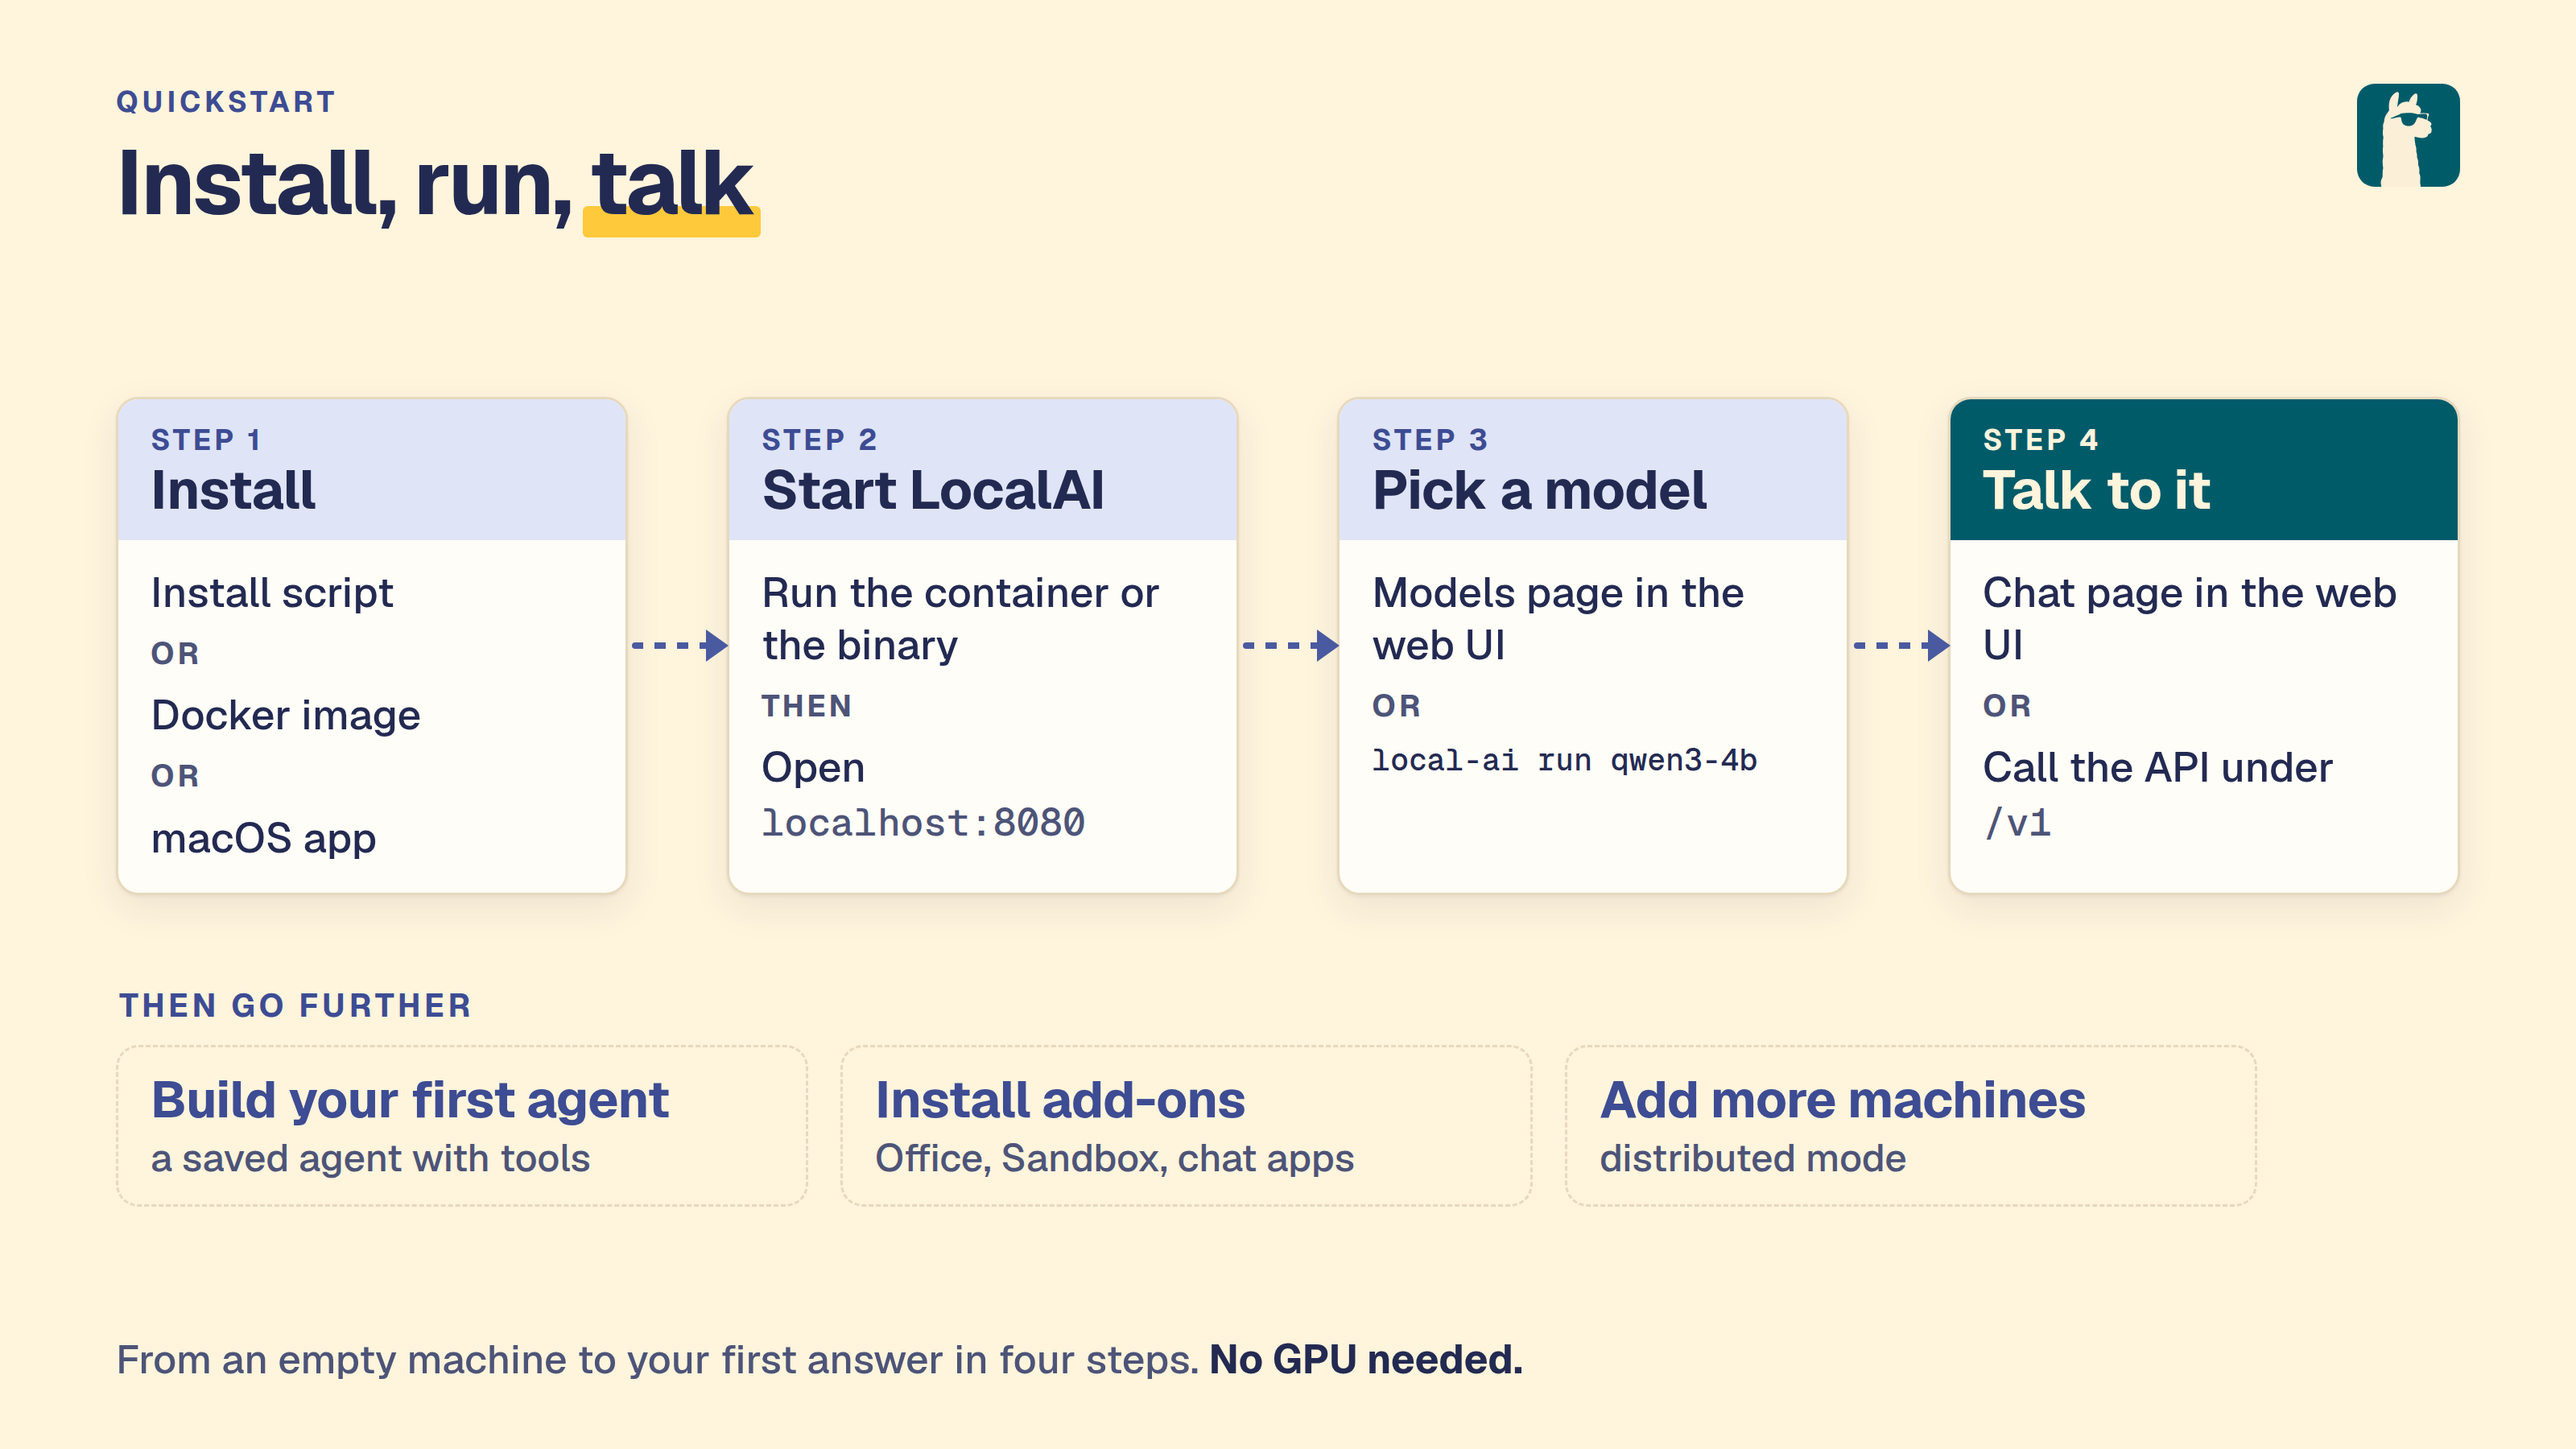
LocalAI is an open source server that speaks the OpenAI and Anthropic APIs. It runs on your hardware. This page takes you from nothing to a first chat reply.
Install and start LocalAI
On Linux, or on a Mac with Apple Silicon, run the install script, then start LocalAI with a model:
On Windows, on an Intel Mac, or when you prefer a container, use Docker instead:
On a Mac you can also use the macOS app. For all install methods, see the install guide.
You should see the log line LocalAI is started and running with the address :8080. The first run of local-ai run qwen3-4b downloads the model, so it takes longer.
For GPU acceleration in a container, use the image that matches your hardware:
| Hardware | Docker image |
|---|---|
| CPU only | localai/localai:latest |
| NVIDIA, CUDA 12 | localai/localai:latest-gpu-nvidia-cuda-12 |
| NVIDIA, CUDA 13 | localai/localai:latest-gpu-nvidia-cuda-13 |
| AMD (ROCm) | localai/localai:latest-gpu-hipblas |
| Intel GPU | localai/localai:latest-gpu-intel |
| Vulkan | localai/localai:latest-gpu-vulkan |
For NVIDIA GPUs, add --gpus all. For AMD, Intel and Vulkan, add the --device flags. See Container images for the full reference.
Chat in the web interface
Open http://localhost:8080 in your browser. The web interface lets you:
- Chat with any installed model
- Explore, install, and manage models from the Models page
- Generate images, audio, and more
- Create and manage AI agents with MCP tool support
- Monitor system resources and loaded models
- Configure settings including GPU acceleration
To get your first chat working:
- Open Models → Explore and search for
qwen3-4b. If you did not start LocalAI withlocal-ai run qwen3-4b, click Install on theqwen3-4bentry and wait for the download to finish.qwen3-4bis a small Qwen3 model for CPU. It also supports tool calling, so you can use it again in Build your first agent. - Open Chats, select
qwen3-4bfrom the model list, type a message and send it.
You should see a reply within a few seconds. On a CPU, the first reply can take longer while the model loads.
To correct an earlier prompt or response without running the model again, hover over the saved message and select Edit. Save updates that conversation’s local history; Cancel discards the draft.
Download models from the CLI
When starting LocalAI (either via Docker or via CLI) you can specify as argument a list of models to install automatically before starting the API, for example:
You can also manage models with the CLI:
Automatic Backend Detection: When you install models from the gallery or YAML files, LocalAI automatically detects your system’s GPU capabilities (NVIDIA, AMD, Intel) and downloads the appropriate backend. For advanced configuration options, see GPU Acceleration.
For a full list of options, run LocalAI with --help, or see the Linux Installation guide.
Use the API
LocalAI exposes an OpenAI-compatible API. You can use it with any OpenAI SDK or client by pointing it to http://localhost:8080. For example:
You should see a JSON answer. The text of the reply is in choices[0].message.content.
LocalAI also supports the Anthropic Messages API, the Open Responses API, and more. See Try it out for examples of all supported endpoints.
Build an agent
An agent is a saved set of instructions and tool grants. It is part of LocalAI. You need no extra install.
- Install a model that supports tool calling, such as
qwen3-4b. - Open Agents in the sidebar and choose New agent.
- Give it a name and instructions, then choose Create agent.
- Choose Chat on the agent’s row.
For the full walkthrough, see Build your first agent.
Before you expose it
By default, LocalAI listens on port 8080 on all interfaces, and authentication is off. Protect the API before you expose it beyond your own machine. You have two options:
- Simple API keys: Run with
LOCALAI_API_KEY=your-keyto gate access. API keys grant full admin access with no role separation. - User authentication: Run with
LOCALAI_AUTH=truefor multi-user support with admin and user roles, OAuth login, per-user API keys and usage tracking. See Authentication and authorization.
What next
There is much more to explore! LocalAI supports video generation, voice cloning, embeddings, image understanding, and more. Check out: